Cleaning your keyboard removes dirt, germs, and debris, improving hygiene, performance, and longevity. Use tools like compressed air, microfiber cloths, and isopropyl alcohol while avoiding excessive liquids for effective maintenance.
Your keyboard is one of the most frequently used tools in your daily life. Whether you’re typing emails, gaming, or finishing up work projects, your keyboard gets a lot of use. Unfortunately, all this use leads to dirt, dust, germs, and even food crumbs getting trapped in and around the keys. Keeping your keyboard clean is not just about aesthetics—it’s essential for hygiene, performance, and prolonging its lifespan.
This blog post will walk you through a simple yet effective guide to clean your keyboard, tips for maintaining it regularly, and avoiding common mistakes.
Why Cleaning Your Keyboard Is Important?
Before we get into the cleaning process, let’s talk about why a clean keyboard matters:
- Hygiene – Keyboards can harbor bacteria, including harmful ones. Studies have shown that some keyboards can be dirtier than a toilet seat!
- Performance – Dust and debris under your keys can make them sticky, unresponsive, or stop working altogether.
- Longevity – Regular cleaning can help reduce wear and tear, elongating the life of your device.
Now that you know why it’s essential, let’s get started with the step-by-step guide!
Step-by-Step Guide to Cleaning Your Keyboard:
Tools You’ll Need:
- Soft-bristled brush or keyboard cleaning brush
- Compressed air can (available in most tech stores)
- Microfiber cloth
- Mild soap or isopropyl alcohol (70%)
- Cotton swabs
- A toothpick (optional)
Step 1: Unplug Your Keyboard
To start, always unplug your keyboard from your computer or power source. For wireless keyboards, turn them off and remove the batteries if applicable. This ensures safety and protects your hardware.
Step 2: Shake Out Loose Debris
Turn your keyboard upside down and gently shake or tap it to dislodge crumbs and dirt. Be gentle—you don’t want to damage any keys in the process!
Step 3: Use Compressed Air
Use a compressed air can to blow out debris stuck between the keys. Aim the nozzle at an angle to direct the airflow under and around the keys. Short bursts work best.
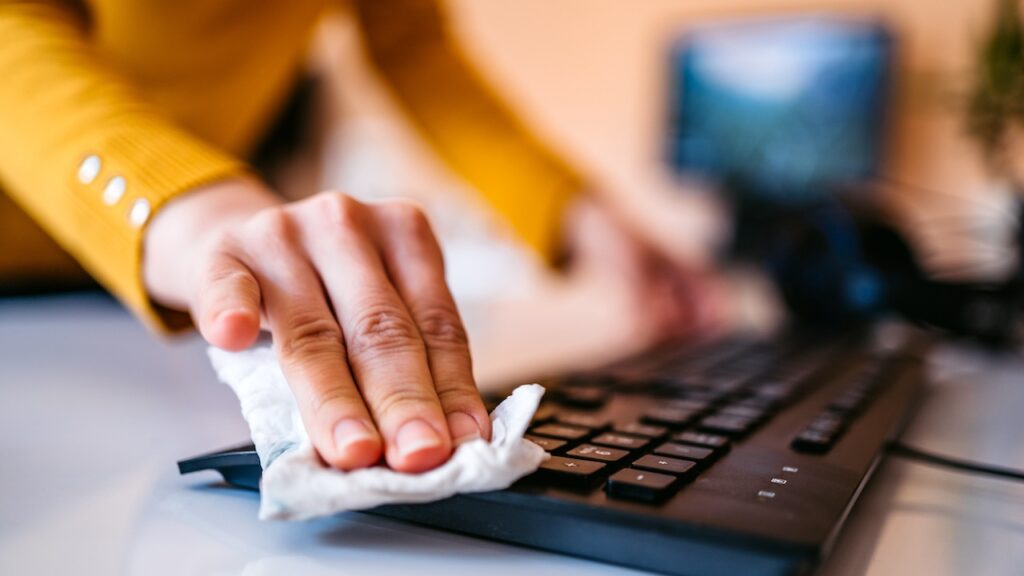
Step 4: Clean the Keycaps
Dampen a microfiber cloth (avoid dripping wet) with water or a bit of mild soap solution. Carefully wipe each keycap, removing smudges and fingerprints. For especially dirty or sticky keys, a cotton swab dipped in isopropyl alcohol works wonders.
Step 5: Clean Between the Keys
For areas between the keys, you can use a keyboard cleaning brush or a toothpick to gently remove stubborn debris. If you’re working on a mechanical keyboard and want a deeper clean, consider removing the keycaps with a keycap puller (ensure you know how to reattach them).
Step 6: Disinfect Your Keyboard
To disinfect, lightly dampen a microfiber cloth with isopropyl alcohol (70%) and wipe down the entire keyboard surface, paying special attention to frequently touched keys like the spacebar and enter key.
Important: Avoid pouring liquids directly on the keyboard—it can damage the internal circuits.
Also Read: How To Undo On Keyboard – A Simple Guide for Beginners!
Regular Maintenance Tips:
To keep your keyboard in pristine condition, here are a few maintenance tips:
- Clean Weekly: Wipe down your keyboard with a microfiber cloth regularly to prevent buildup.
- Avoid Eating at Your Desk: Food crumbs are a key culprit in causing dirty keyboards. Try to keep snacks and meals away.
- Wash Your Hands: Clean hands mean fewer oils and germs transferring to your keys.
- Keyboard Covers: Consider investing in a keyboard silicone cover to prevent dust and spills.
Common Mistakes to Avoid:

- Using Excessive Liquid: Too much liquid can drip into the keyboard, causing irreversible damage.
- Skipping the Power Off Step: Always unplug or turn off your keyboard before cleaning it.
- Neglecting to Use the Right Tools: Not all cleaning tools are safe for keyboards. Avoid abrasive materials that can scratch your keys.
Keeping Your Keyboard—and You—Healthy:
A clean keyboard is not just about looks; it directly impacts your health and productivity. By following these simple steps and adopting the habit of regular maintenance, you can ensure your keyboard stays in top condition for years to come.
If you’re ready to avoid sticky keys and stubborn germs, try these tips today and notice the difference in your typing experience—and your peace of mind! Share this guide with your fellow tech enthusiasts to keep their keyboards spotless too.
FAQs:
1. Why should I clean my keyboard regularly?
Regular cleaning improves hygiene, reduces bacteria buildup, ensures smoother key performance, and extends the keyboard’s lifespan. It also enhances your typing experience and prevents sticky or unresponsive keys.
2. What tools do I need for keyboard cleaning?
You’ll need a soft-bristled brush, compressed air, microfiber cloth, isopropyl alcohol (70%), cotton swabs, and optionally, a toothpick or keycap puller for thorough cleaning between keys.
3. Can I clean my keyboard with water?
Yes, but sparingly. Use a damp microfiber cloth with water or mild soap. Avoid dripping liquid, and never pour water directly onto the keyboard to prevent damage.
4. How often should I clean my keyboard?
Wipe down your keyboard weekly to prevent buildup. For deep cleaning, aim for once a month or more frequently if you use it daily in dusty or shared environments.
5. Are there shortcuts for keeping my keyboard clean?
Avoid eating at your desk, wash your hands before typing, and consider using a silicone keyboard cover to protect against dust, spills, and debris.
Conclusion:
Keeping your keyboard clean ensures better hygiene, smoother performance, and longer device life. By following a few simple steps—like using compressed air, wiping with a damp cloth, and disinfecting with isopropyl alcohol—you can remove dirt and germs effectively. Regular maintenance, like avoiding food near your keyboard and weekly wipe-downs, keeps it in top condition. A clean keyboard enhances productivity and ensures a healthier, more enjoyable typing experience every day.